The advantages of air pruning pots
How to fill an air pot with soil mix?
Removing plant from an air pot.
What is an air pruning pot?
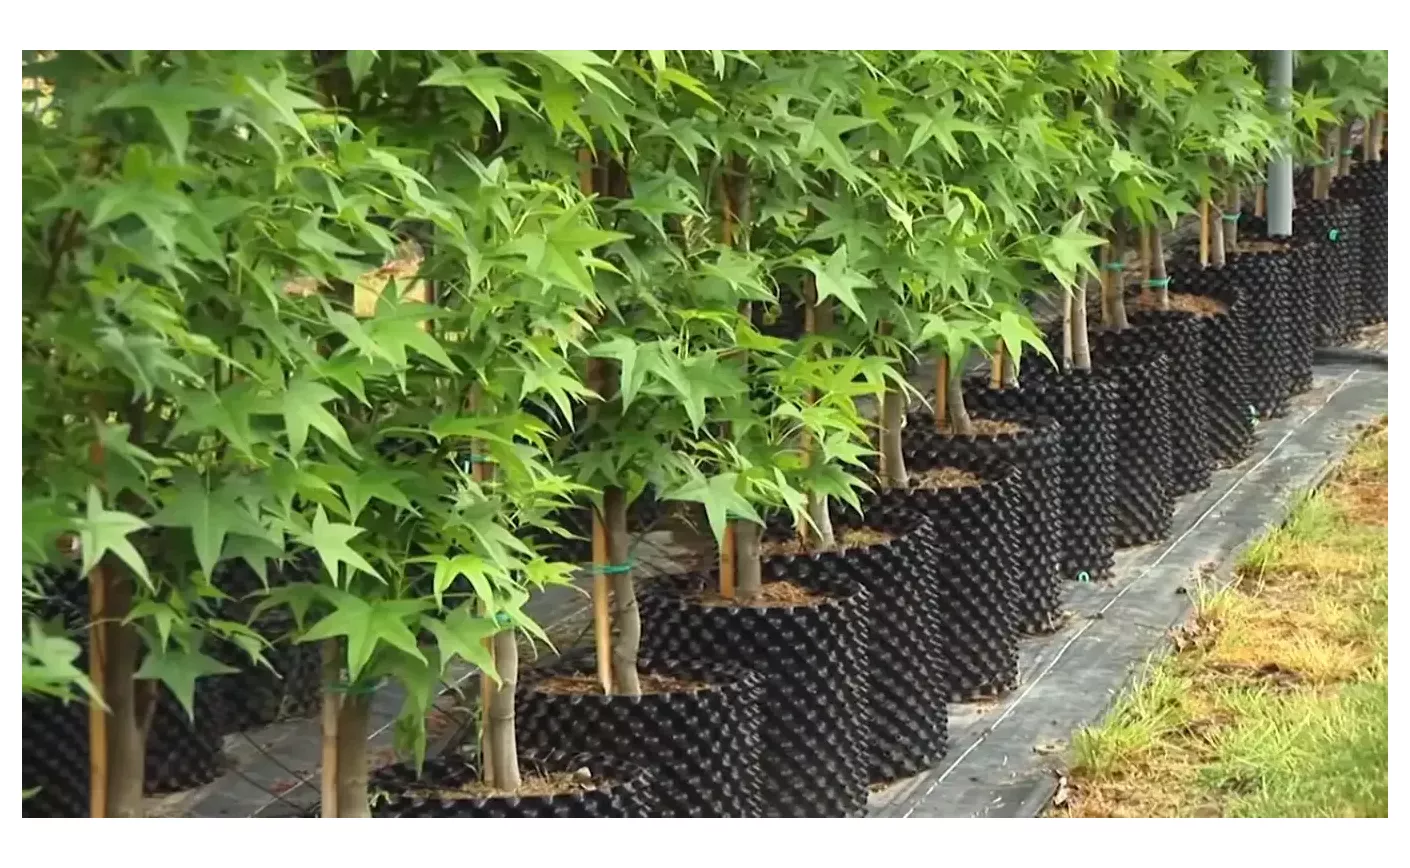
Air pruning pots are easy to use and are suitable for growing most plants, including trees.
Plants growing in air-pruning pots have a denser and heathier root system compared to conventional plastic pots.
Air pots are available in PVC, PE, and PET materials.
The advantages of air-pruning pots
In a conventional pot or drum, the roots, as they reach the side walls, coil and grow along the circumference of the pot.
This does not benefit the plant as the root density is concentrated along the wall of the container.
When left in that state for a considerable time, this coiling of roots results in stunted growth even when transplanted to the ground.
In an air-pruning pot, the roots, when they reach the sidewall, try to grow through the side-holes, become dehydrated and prune instead of coiling.
This air pruning of roots results in new lateral roots emerging from the central root or the tap root. This results in a uniform, dense, and better developed root system.
The root system of a plant in an air-pruning pot when planted on the ground is established easily because of the lateral development of the existing root system.
The large number of holes on the sides gives good air circulation for the roots. It also enhances the microbial activity inside the pot.
The sidewall of the pot is held in place with the help of a screw mechanism.
If at anytime it needs to be planted on the ground, it is easy to remove the plant from the pot without damaging the roots by removing these screws. Thus, these pots could be easily reused as well.
The advantages of air pruning make it the de facto choice for growing fruit plants and even trees, more so when transplanting is expected
Where are air pots used?
Air pots are used for growing all sorts of plants that are grown in conventional plastic or fabric containers, but with better results. The advantages of air pruning make it the de facto choice for growing fruit plants and even trees, more so when transplanting is expected.
How to assemble an air pot
Once you understand the basics, assembling an air pot is quite simple and takes less than a minute.
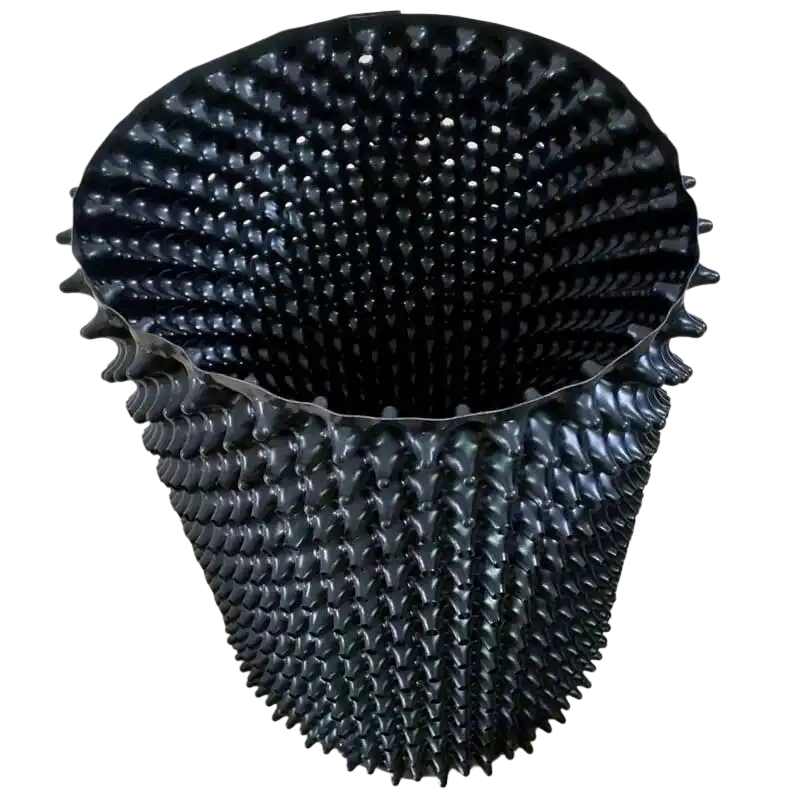
An air pot consists of 3 parts.
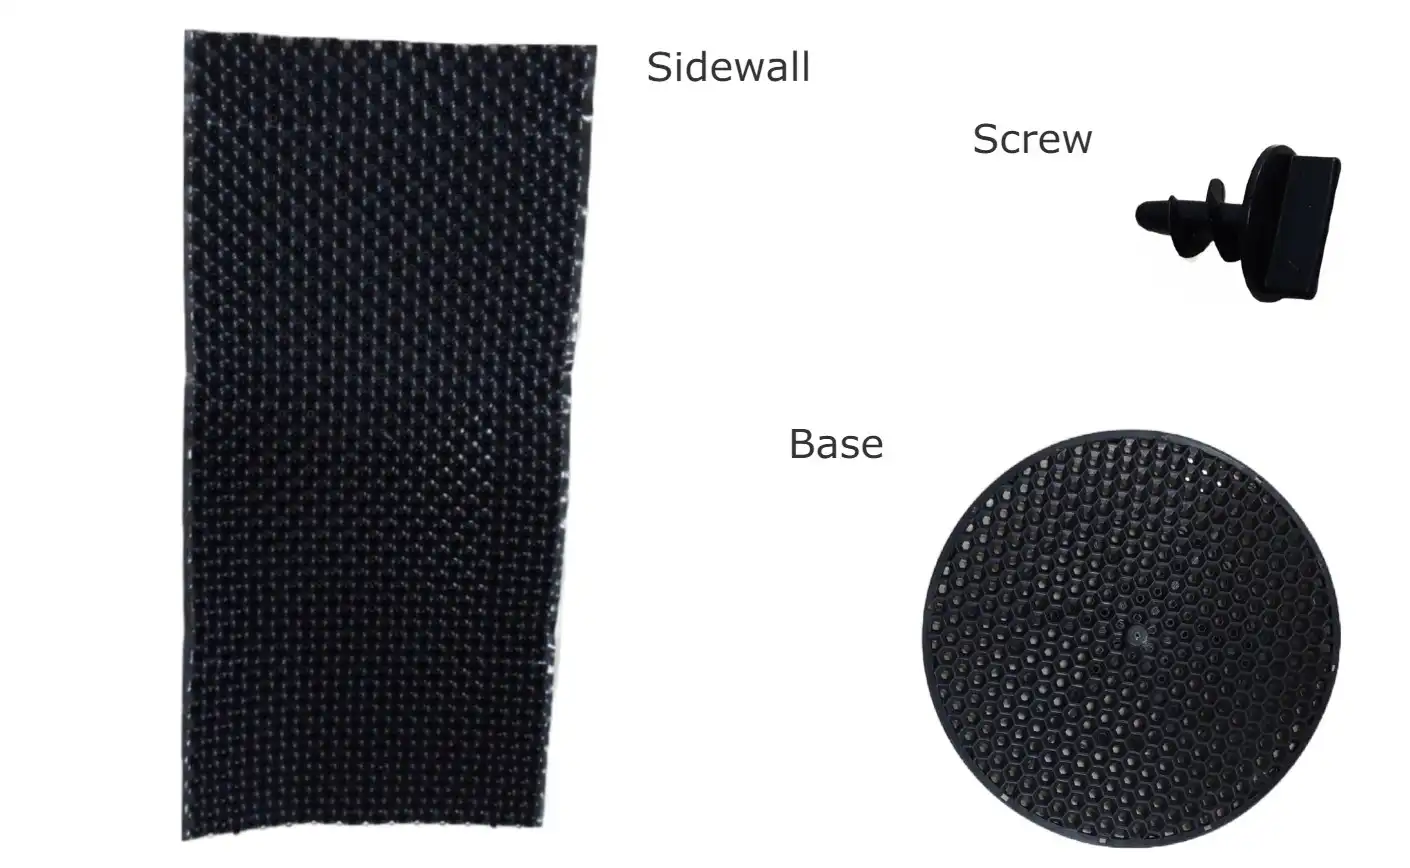
1. Sidewall
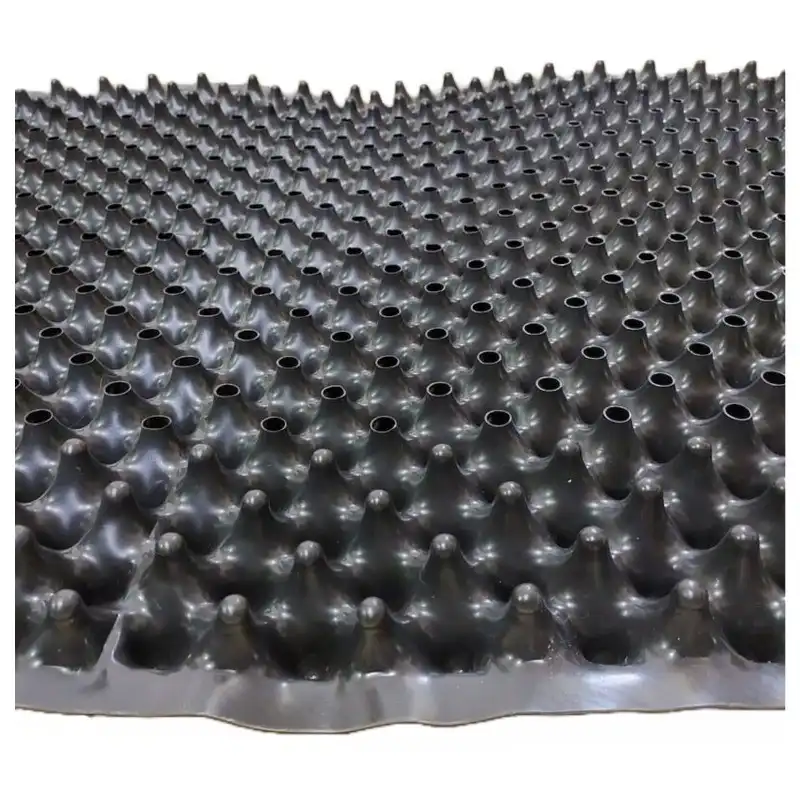
The side wall will have on one side, usually three rows wide, where the spikes do not have holes. Let's call these covered spikes.
Some sidewall styles may have covered spikes on both sides.
2. Base
The base will have a short button-shaped protruding part at the centre. When the pot is assembled, this side should come out at the top.
Sometimes the base will have a bush-like appearance on one side. In this case, the bush should come at the bottom.
3. Screw (fastener)
Keep the sidewall roll on a flat surface with the spikes with holes at the bottom.
On the horizontally placed sidewall sheet, place the base vertically, skipping the outermost row of the sidewall.
Make sure the side opposite to where the base is placed has covered spikes.
This is to ensure that the water given to the plant does not immediately fall through the side holes.
Then roll the sidewall along the base. Now the sidewall spikes with holes pointing outside. When rolled, the sidewall will overlap at the end. Use the screws provided to fasten the ends.
To do that, place the screw in an overlapping hole and turn it till it is fully inside the hole.
Space the provided screws equidistant, leaving one or two rows at the top and bottom.
Your air pruning pot is ready to be filled.
How to fill an air pot
Prepare the required quantity of soil mix as per your air pot size.
If you find it difficult to mix large quantities of soil and fertiliser together, add some soil first and then add the fertiliser and mix thoroughly by hand. Again, add some soil and repeat till the pot is full.
Place the pot on a flat surface. Ensure that, right from the bottom, you fill the soil mix evenly on all sides to maintain the round shape, or else the container will lose shape and tilt.
The protruding spikes with holes should be filled with soil mix. This is very important as the roots should grow in this space. This is done by pressing the soil mix by hand on to the sides. Thus, the soil mix should remain tight and evenly on the sidewall.
Unlike conventional pots, fill the air pot to almost the edge of the pot, leaving less than an inch at the top. Also take into account the space needed for the plant to be potted. The soil mix would eventually settle a couple of inches down within a few months.
Removing a plant from an air port
To remove a plant from an air pot, remove the screws by rotating it in the anti-clockwise direction and taking off the sidewall. The plant is then free to be lifted off its base.